We can have user-defined operations in Maximo by adding menu items to an application using Application Designer.
The functionality of the menu item can be implemented in various ways:
- invoke an action
- launch a dialog
- invoke an automation script
- invoke a method in Java class
Here is how to implement each one of them:
Add a signature option
Before defining a menu item, a Signature Option (SigOption) must be created which helps control access to the new option.

Important: In advanced Signature Options,
– choose ‘None‘ if you want to launch a dialog
– choose ‘This is an action that must be involved by user in the UI‘ if you want to invoke an action
Add menu item
Next, create a menu item in one of the two available menus.
- ‘Select Action’ menu
- ‘Toolbar’ menu
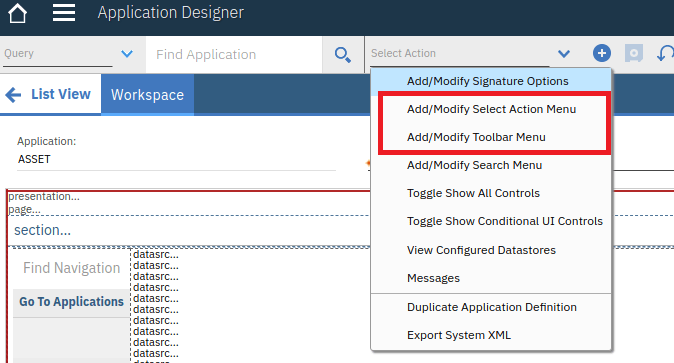
Let’s go for the ‘Select Action’ menu for this example.

The ‘Key Value’ field references the SigOption created above.
Grant access to users
We have to grant access to the relevant Security Groups on this SigOption for users to see the new menu item.
Implement functionality
Now, what do we want to happen when the user clicks the menu item? We have a number of options:
- invoke an action
- launch a dialog
- invoke an automation script
- invoke a method in Java class
Maximo links a menu item with an action or a dialog or a method in the class based on the naming convention. We simply need to give it exact same name and the system will automatically trigger the desired option.
Invoke an action
Simply create an action with the same name as the menu item.

See the note above to properly configure SigOption for invoking an action.
Launch a dialog
Create a new dialog with the same id in the application’s XML file.
<dialog id="MYACTION" label="A test dialog" relationship="MYNONPERSISTENOBJECT">
   <section id="myobject_grid1">
      <textbox dataattribute="duedate" id="myobject_grid1_row1" lookup="datelookup"/>
   </section>
   <buttongroup id="myobject_2">
      <pushbutton default="true" id="myobject_2_1" label="OK" mxevent="dialogok" />
      <pushbutton id="myobjecy_2_2" label="Cancel" mxevent="dialogcancel"/>
   </buttongroup>
</dialog>
For handling dialog using Automation Script, refer to this blog post.
Invoking Automation Script
For invoking automation script, create a Script with Action Launch Point. This will basically create an action that invokes the automation script.


Complete the third step to create the automation script.
This is going to create an action in the background as shown below.

Invoking automation script is actually invoking an action that then triggers the script, therefore, we have to set up Signature Option settings the same way as we do for actions (choose ‘This is an action that must be involved by user in the UI‘ instead of ‘None’).
Invoke a Java method
We need to extend the application BEAN class and include our method in it.
package mycomp.webclient.beans.asset;

public class MyAssetAppBean extends psdi.webclient.beans.asset.AssetAppBean
{
  public int MYACTION() throws MXException, RemoteException
  {
    // put your custom code here
    return EVENT_HANDLED;
  }
}
Please note the method name is the same as the SigOption name.
In the application’s XML, we have to replace the bean class name with our custom class.
This also requires rebuilding and deploying the EAR file.